
emqx安装
2024年9月27日大约 4 分钟
操作系统中安装
类似教程和文档太多,针对windows和linux有不同的安装方式,这里就不具体介绍。主要介绍下docker方式安装。
docker安装
提示
运行容器前,没有网桥,请先创建网桥,用于容器间通讯: docker network create -d bridge fastbee-bridge
执行一下命令安装emqx5.1
docker run \
--name emqx \
--publish 1883:1883 \
--publish 8083:8083 \
--publish 8883:8883 \
--publish 8084:8084 \
--publish 18083:18083 \
--env TimeZone=Asia/Shanghai \
--volume /etc/localtime:/etc/localtime \
--restart unless-stopped \
--detach \
emqx:5.1
Emqx5配置
Emqx配置Http认证和Webhook(处理客户端上下线),有两种方式:
- 通过emqx.conf文件配置,已有配置好的文件位于
docker/data/emqx/ect文件夹; - 通过18083端口,打开Emqx控制台,创建客户端认证,数据桥接和规则
- 通过emqx.conf文件配置,已有配置好的文件位于
Emqx账号
- 控制台默认账号 (admin,public)
- docker-compose方式部署,emqx.conf中配置的账号(admin,admin123)
注意
Emqx控制台修改的账号,配置的Http认证、Webhook和规则会被emqx.conf中对应配置覆盖掉。官网解释如下:
- 通过 Dashboard、HTTP API 或 CLI 进行的更改将在运行时写入 data/configs/cluster.hocon 文件并立即生效。
- 如果相同的配置项在 etc/emqx.conf 文件中设置不同值,则在重新启动后,最终生效的是 etc/emqx.conf 中的配置。 为避免混淆,强烈建议不要在 cluster.hocon 和 emqx.conf 中具有相同的配置键。
emqx.conf配置文件中存在任何规则,设备消息转发的规则,也要配置在emqx.conf中。
1.配置文件方式
下面内容复制到emqx.conf文件中
# 设置控制台端口和默认账号
dashboard {
    listeners.http {
        bind = 18083
    }
    default_username = "admin"
    default_password = "admin123"
}

# http 认证
authentication  = [
  {
    mechanism = password_based
    backend = http
    enable = true
    method = post
    url = "http://177.7.0.13:8080/iot/tool/mqtt/authv5"
    body {
        clientid = "${clientid}"
        username = "${username}"
        password = "${password}"
        peerhost = "${peerhost}"
    }
    headers {
        "Content-Type" = "application/json"
        "X-Request-Source" = "EMQX"
    }
  }
]

# WebHook(匹配上线和下线规则后触发)
bridges {
  webhook.fastbee_hook  =
  {
    enable  =  true
    connect_timeout  =  15s
    retry_interval  =  60s
    pool_type  =  random
    pool_size  =  8
    enable_pipelining  =  100
    max_retries  =  2
    request_timeout  =  15s
    method  =  post
    url  =  "http://177.7.0.13:8080/iot/tool/mqtt/webhookv5"
    body  =  "{\"clientid\" : \"${clientid}\",\"event\" : \"${event}\",\"peername\" : \"${peername}\"}"
    headers  =  {  accept = "application/json"  "cache-control" = "no-cache"  connection = "keep-alive"  "content-type" = "application/json"  "keep-alive" = "timeout=5"}
  }
}

# 规则(处理上线和下线)
rule_engine {
  ignore_sys_message  =  true
  jq_function_default_timeout  =  10s
  rules.fastbee_rule  =
  {
    sql  =  "SELECT * FROM \"t/#\",\"$events/client_connected\", \"$events/client_disconnected\", \"$events/session_subscribed\""
    actions  =  ["webhook:fastbee_hook"]
    enable  =  true
    description  =  "处理设备上下线和订阅完主题的规则"
  }
}
2.控制台创建方式
a.配置Http认证
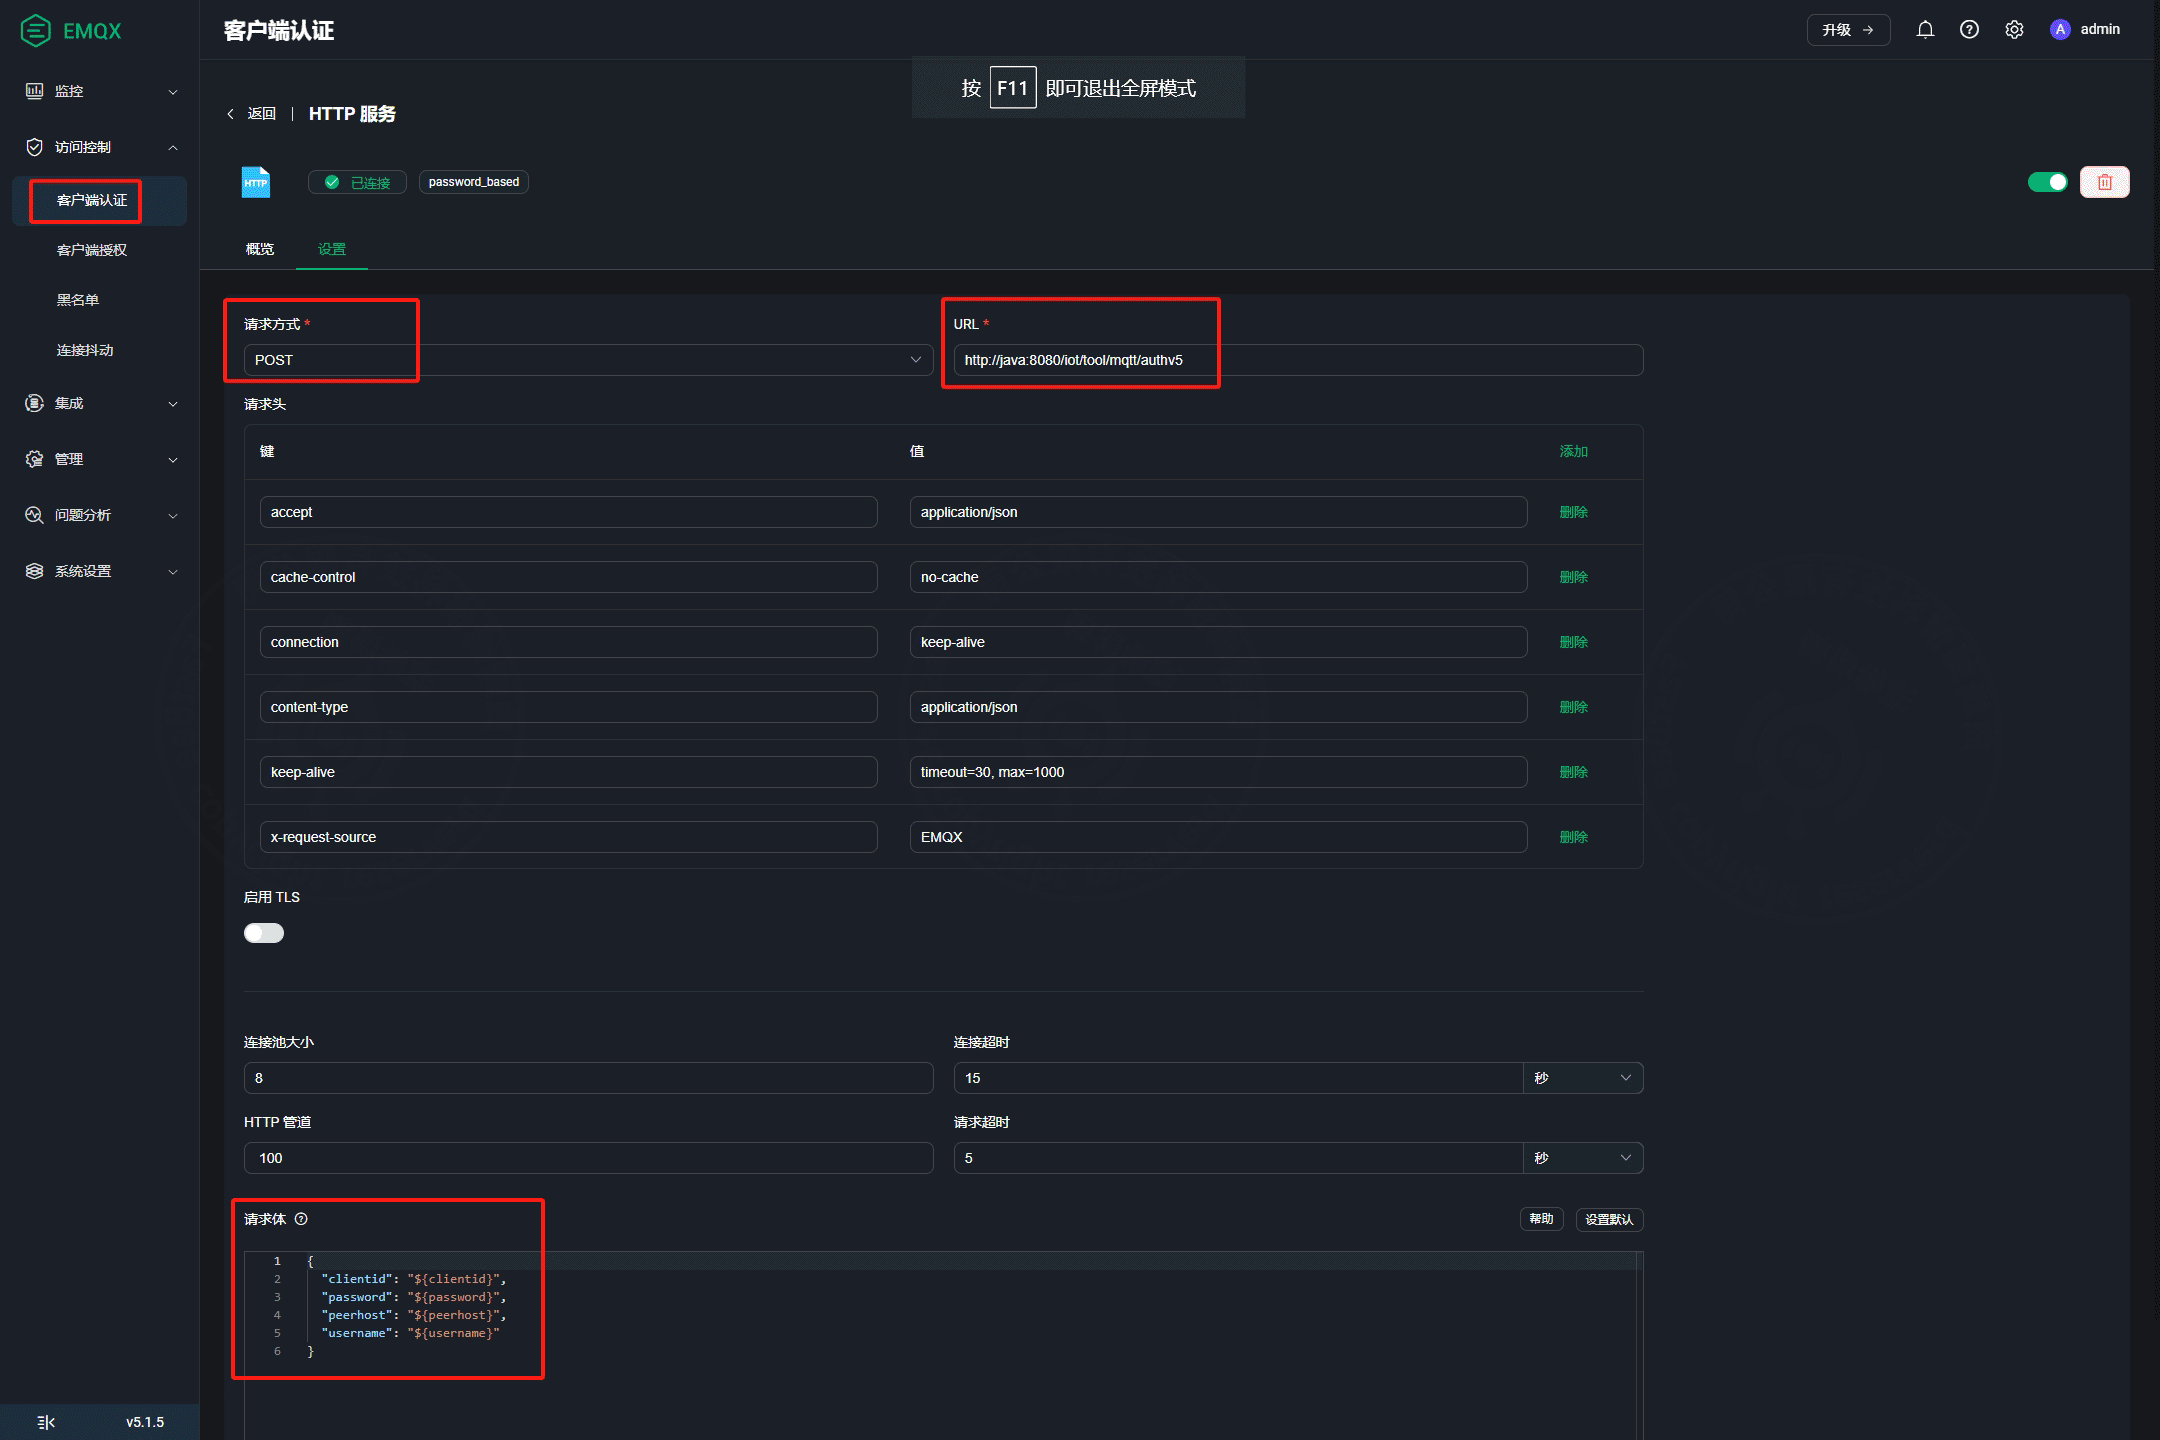
请求方式:POST
请求地址:http://177.7.0.13:8080/iot/tool/mqtt/authv5 (地址可以是内网或者外网,确保能访问)
请求Body:
{
"clientid": "${clientid}",
"password": "${password}",
"username": "${username}",
"peerhost": "${peerhost}"
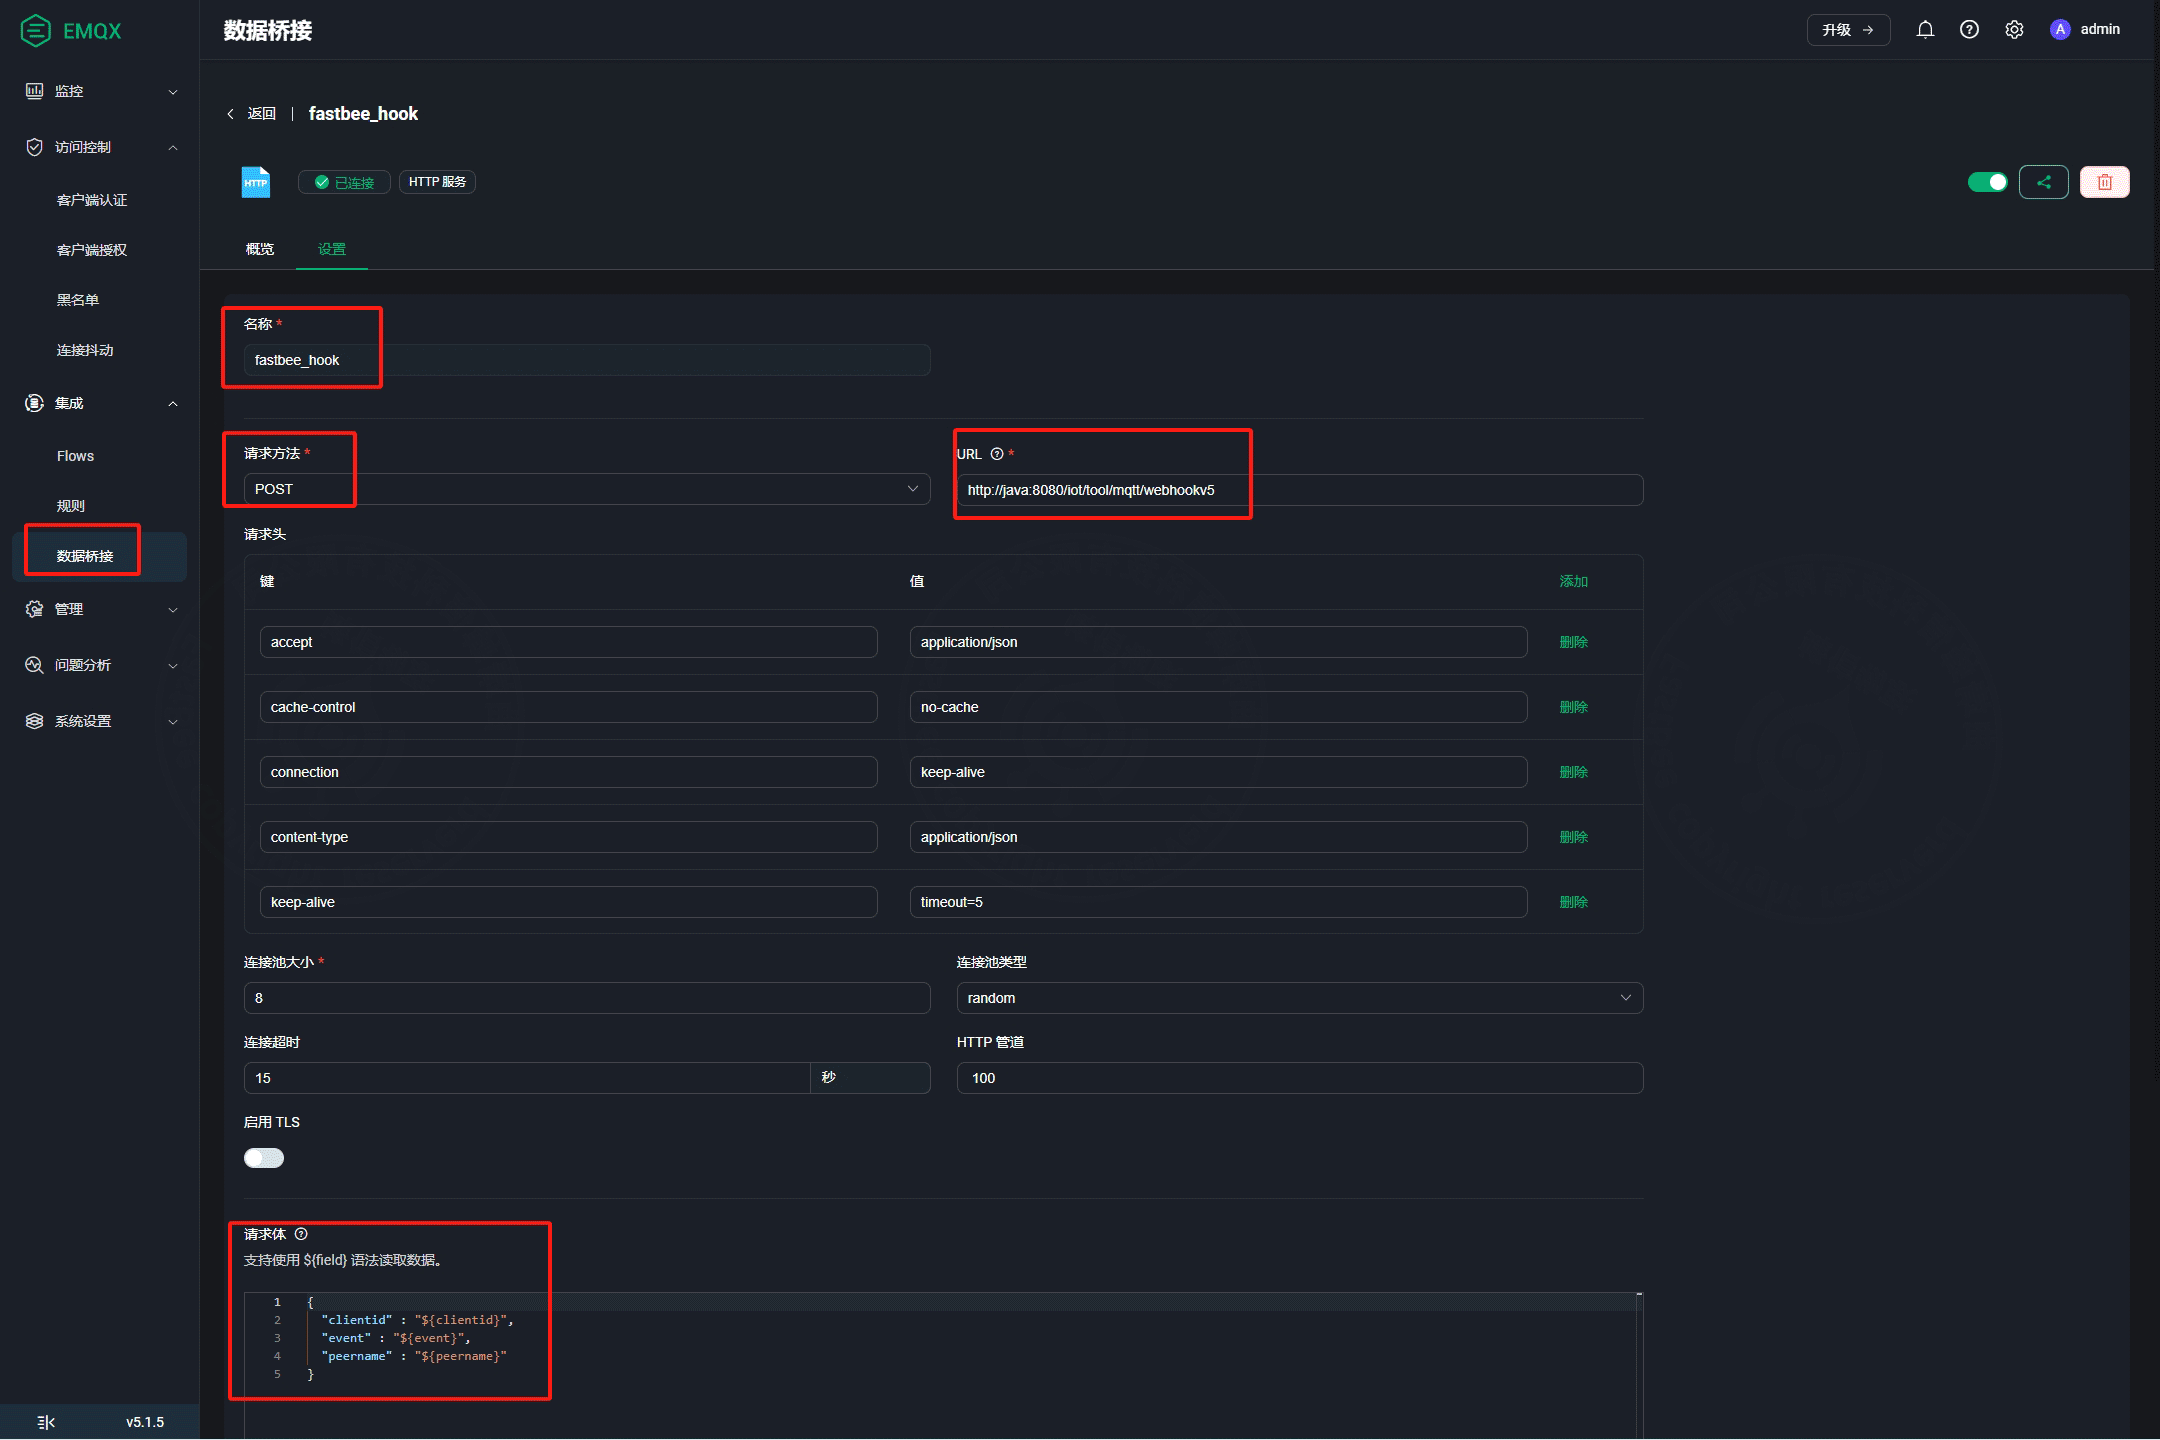
}b.配置WebHook(目前emqx已经从5.1升级到5.7.2版本,两个版本webHook创建方式不一样,具体如下)
Webhook配置,先创建数据桥接,然后创建规则,规则跟数据桥接关联
5.1版本:
5.7.2版本: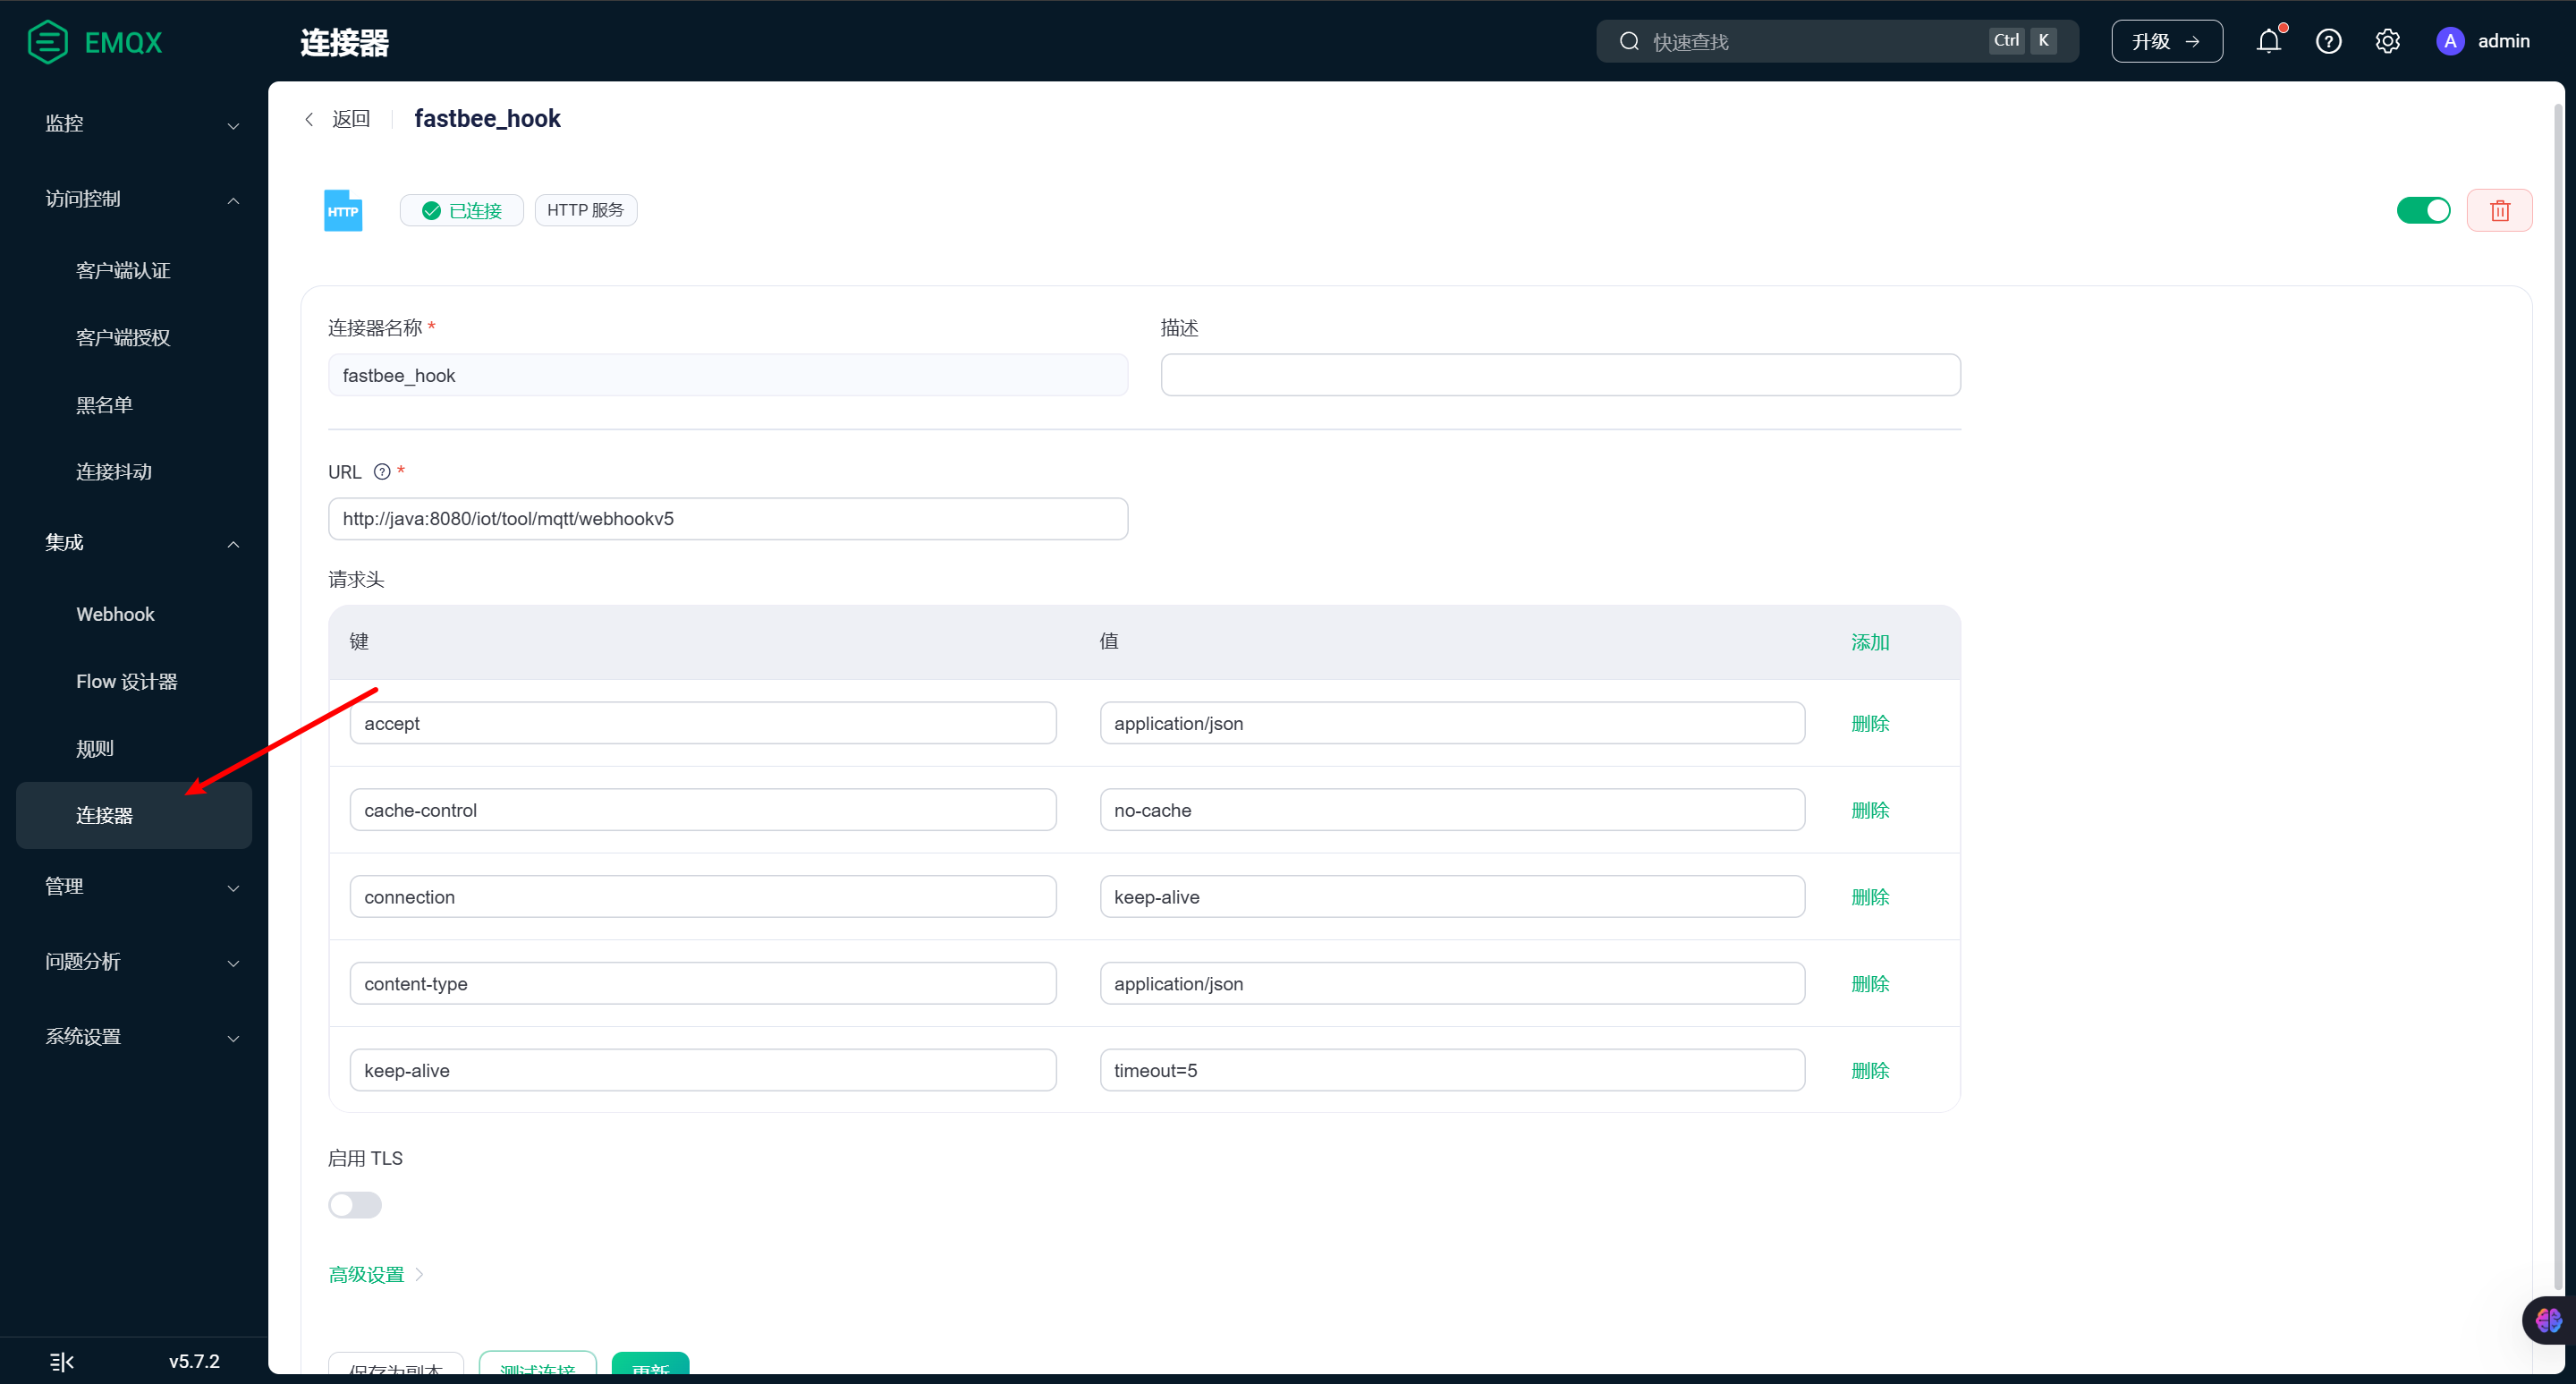
数据桥接名称:fastbee_hook (随意填写)

请求方式:POST

请求地址:http://177.7.0.13:8080/iot/tool/mqtt/webhookv5 (地址可以是内网或者外网,确保能访问)

请求Body:
{"clientid" : "${clientid}", "event" : "${event}", "peername" : "${peername}"}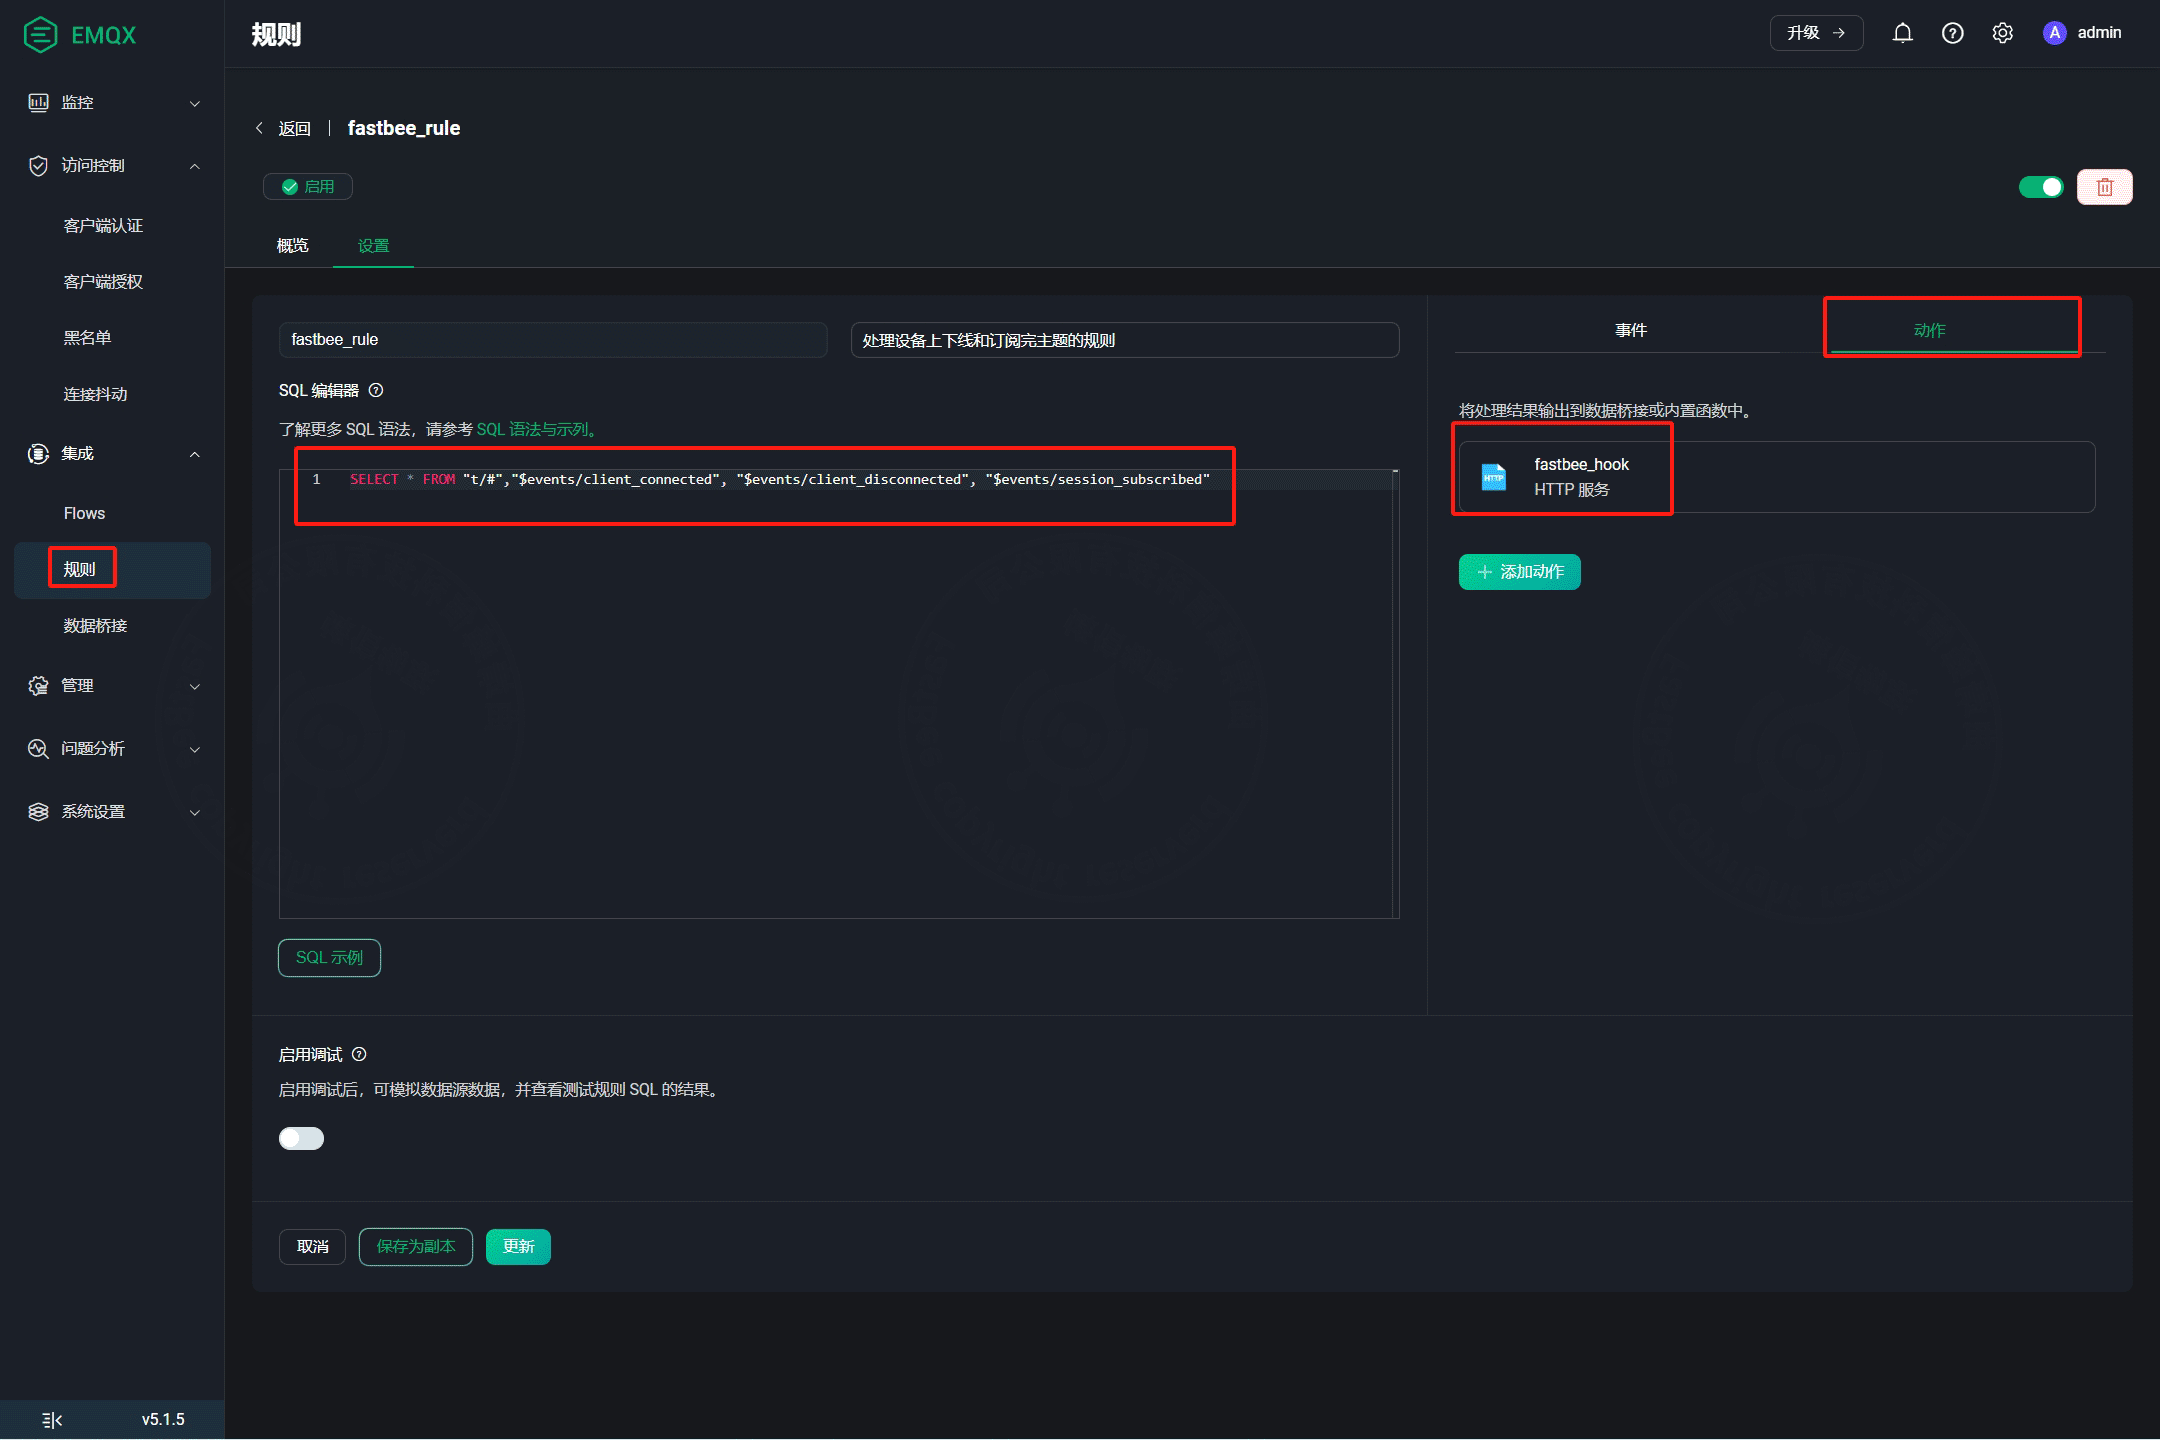
规则名称:fastbee_rule (随意填写)
SQL编辑器内容(分别代表客户端连接/断开连接/主题订阅完成):
SELECT * FROM "t/#","$events/client_connected", "$events/client_disconnected", "$events/session_subscribed"
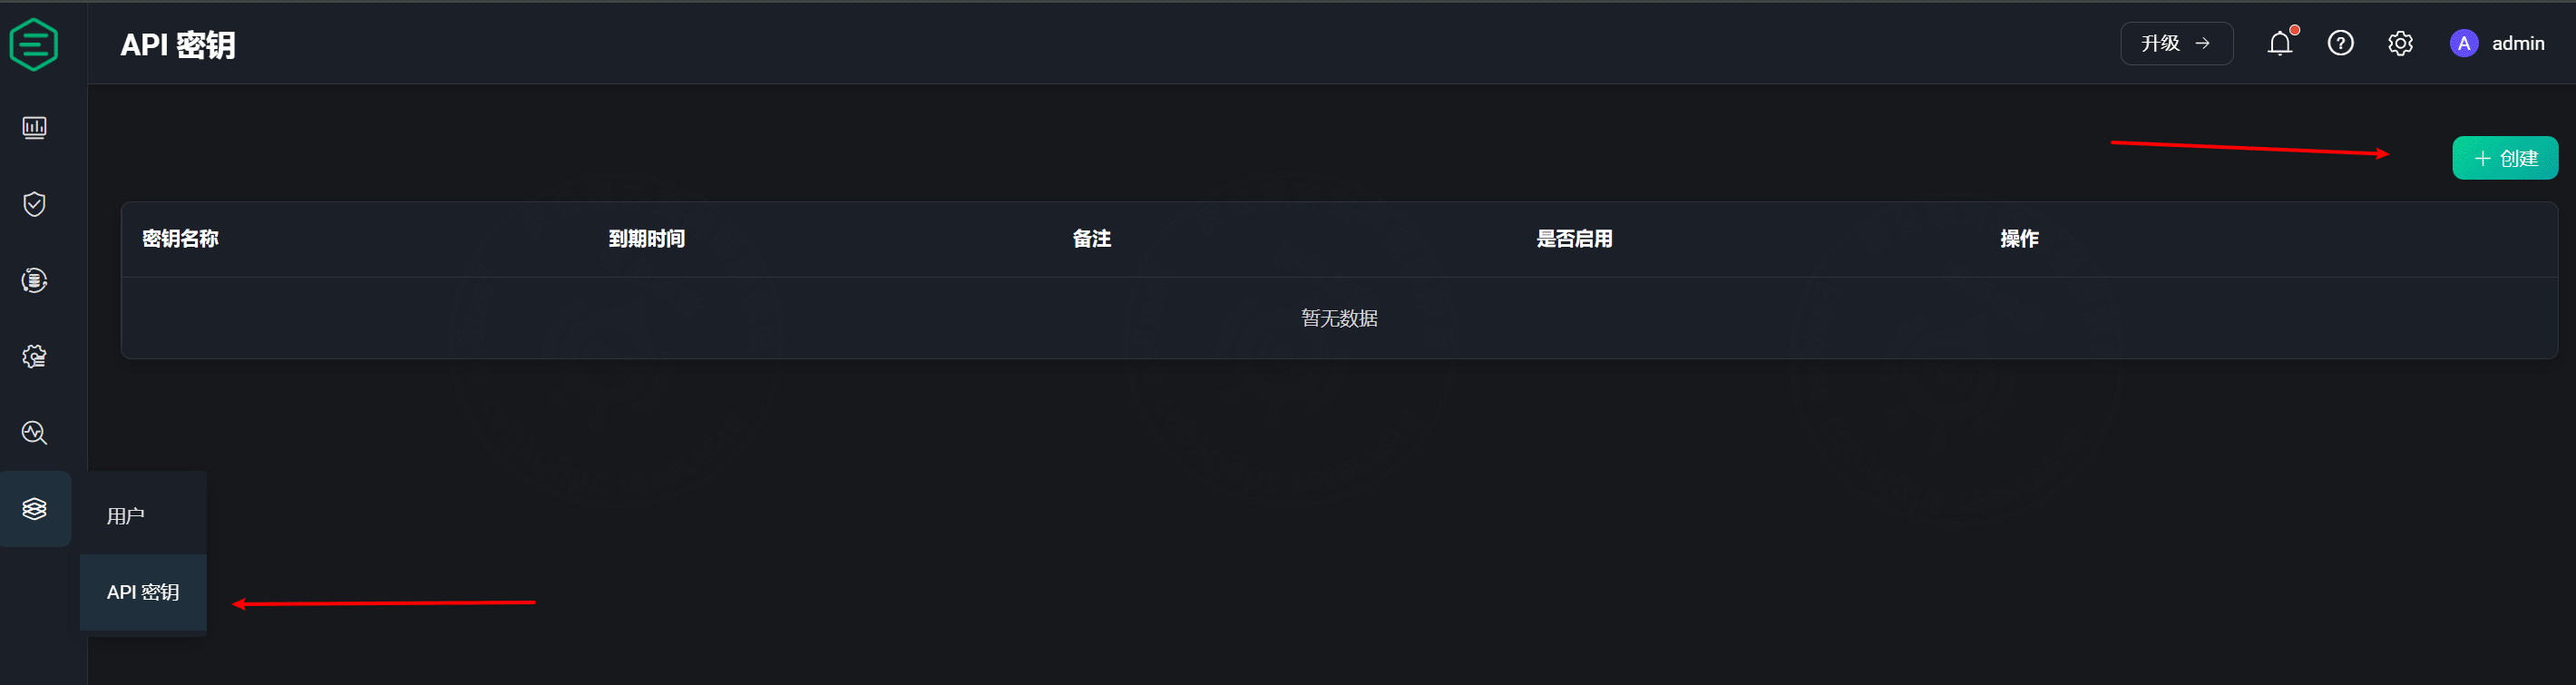
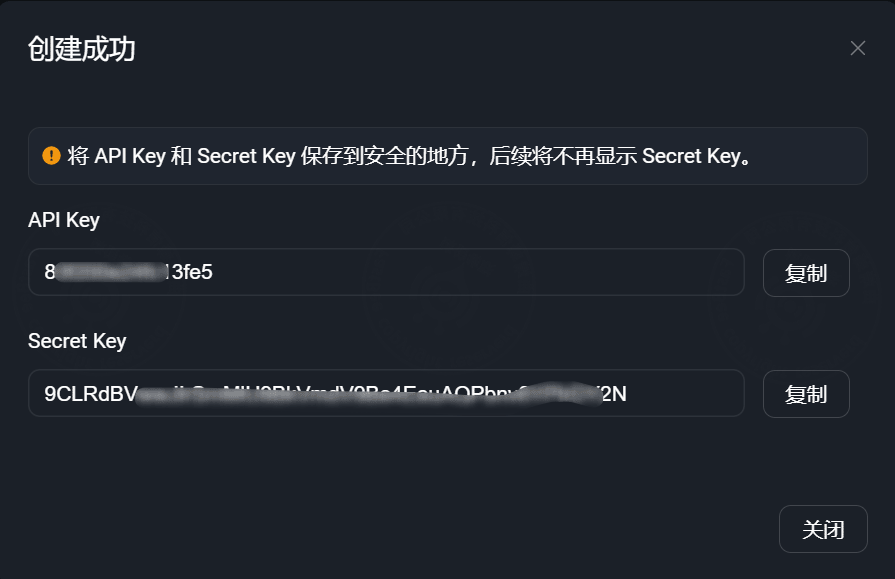
动作:选择创建的数据桥接fastbee_hook3.设备上下线确认
为保证设备准确上下线,项目运行后,可在emqx控制台创建API密钥,并且将apiKey和apiSecret添加到application.yml中,重启Java服务

Emqx4.0 安装配置
提示
针对2.0及之前版本,新版本不再使用emqx4.0
FastBee v2.0以及之前版本使用Emqx4.0,新版本不再使用,这里介绍下emqx4.0的对应安装和配置,安装使用docker,其他安装方式可以查看emqx官网。
1. docker安装emqx4.0
docker run \
--name emqx \
--publish 1883:1883 \
--publish 8081:8081 \
--publish 8083:8083 \
--publish 8883:8883 \
--publish 8084:8084 \
--publish 18083:18083 \
--restart unless-stopped \
--detach \
emqx/emqx:v4.0.0
2. HTTP认证
提示
配置中可以注释超级管理员认证和ACL相关内容,提高速度
# a. 进入docker容器命令
# docker exec -it emqx /bin/sh

# b. 找到etc/plugins/emqx_auth_http.conf 文件,修改http认证请求地址,内容如下:
auth.http.auth_req = https://IP或域名/prod-api/iot/tool/mqtt/auth
3.WebHook设备上下线
提示
注释不用的钩子事件,提高性能
## 找到 etc/plugins/emqx_web_hook.conf 文件,修改请求地址,内容如下:
web.hook.api.url = https://IP或域名/prod-api/iot/tool/mqtt/webhook
4.禁用匿名认证
# 找到etc/emqx.conf 文件,修改值为false
allow_anonymous = true